The coolant in the radiator of my car was milky and brown and I wanted to give it a proper flush. I found plenty of info about simply adding some cleaner, letting it run and draining the fluid. I wanted to give the system a proper cleaning also known as backflushing the radiator.
Backflush a radiator in 8 steps: 1. Drain Coolant 2. Remove Radiator Hoses 3. Remove Thermostat 4. Flush Radiator 5. Flush Engine Block 6. Reinstall Hoses 7. Add distilled water and flush 8. Add Coolant. This is the easiest most efficient way to do it.
1. Drain Coolant
Open the drain plug on the bottom of the radiator.
Pro Tip: These most often have a hole or slit in them so you do not have to back them out completely and they will drain.
Catch the radiator fluid in a drain pan.
Also in step 1 is included disconnecting the battery which is common practice for any job like this.
It is a good idea to cover your alternator or other parts that may get sprayed with water that shouldn’t at this time.
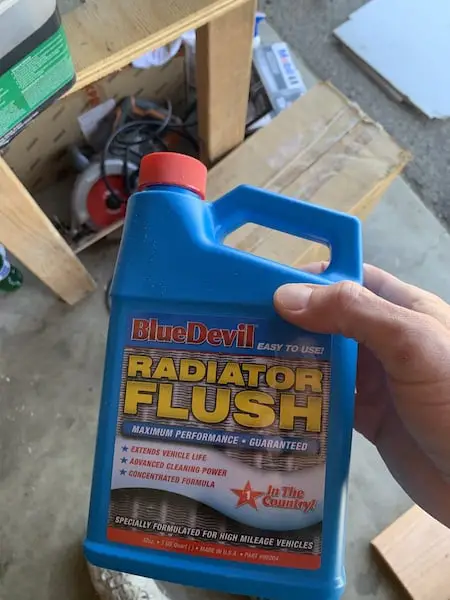
Before moving on to the backflush, which is forcing coolant the opposite direction that it normally flows through the radiator, I suggest trying a relatively cheap and much simpler alternative first. Buy a radiator flush product such as BlueDevil Radiator Flush, add it to the radiator with water, run the engine for a few minutes and then drain it out again. It’s that simple!
Otherwise, go ahead and move on with a backflush which is much more effective at removing corrosion and mineral deposits than a simple radiator flush with a liquid flush product.
2. Remove Radiator Hoses
Disconnect both the top and bottom radiator hoses from the radiator side only!
This is because you are going to remove the thermostat housing (which is where the upper hose connects to the engine block) and the lower hose can stay attached to the block down below.
This is if you are not going to replace the lower radiator hose. If you want to replace it then of course remove them both completely. For a better guide of how to replace radiator hoses read this article I wrote.
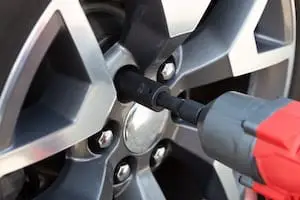
3. Remove Thermostat
Generally there are only 2 bolts to remove at the thermostat housing and this will expose the thermostat and gasket.
Do not forget to order a new thermostat and new gasket while you are at it!
4. Flush Radiator
To flush the radiator the most important tool you should spend a few dollars on is this air compressor attachment that will allow you to use some pressurized air tp flush out the water and push any gunk out of the system.
A tool like this on Amazon is just what you need.
This allows you to push pressurized water through the system and is a must have for a job like this. Without pressure hooked up to the cooling system, you will not break free the majority of the gunk in the system.
Hook up the air to the flush gun. Use a garden hose to wash water through the system through the top radiator hose, and then follow it up with pressurized air.
5. Flush Engine Block
Press the flush gun into the lower radiator hose going into the engine block. This will force water in the reverse direction that it usually flows through the engine and out the thermostat housing. If you have replaced the upper hose and thermostat housing (without the thermostat in it) then it will make directing the water much easier and make less of a mess.
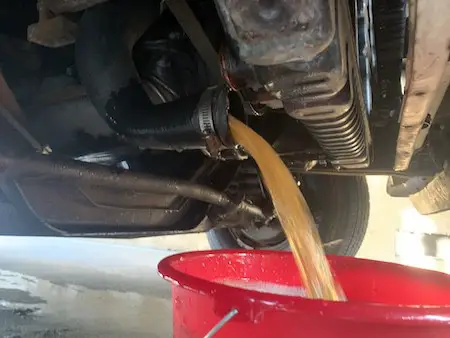
Just keep blasting water through the block until it comes out clear.
6. Reinstall Radiator Hoses
Reinstall the thermostat with the new gasket and the new radiator hoses.
Again the use of tools such as the hose clamp removal tool is a real time-saver.
7. Add Distilled Water and Flush
Always use distilled water in your engine’s cooling system to minimize corrosion and mineral deposits in the system. Not using distilled water may be the very reason that you are having to do this coolant flush now.
The best way to get the garden hose water out of the engine block is by filling the radiator with distilled water, run the engine for 2 minutes, then drain the radiator again. This extra few minutes and the few dollars extra on some distilled water are well worth having purified water in your freshly cleaned cooling system.
8. Add Coolant
A potential reason that the radiator is so gunked is that good coolant may not have been used. Water may be used as long as the radiator is not in a freezing environment, but water alone will corrode the radiator and engine block. Spend the couple extra dollars on some name brand coolant and your engine will run happily for much longer.
Add a 50/50 mixture of Anti-freeze and distilled water to the radiator, clean everything up, and you are done!
What tools do you need to backflush a radiator?
Complete List of Tools Required to Backflush a Radiator:
- cooling system flush gun
- Air compressor (to attach to flush gun)
- Garden hose (with water flowing through it)
- drain pan (to catch coolant)
- Utility knife (to cut off old hoses)
- Socket or wrench for thermostat housing
- Thermostat and gasket (replace the gasket definitely and the thermostat is recommended as well)
- hose clamp removal tool
- Pick or Screwdriver (to pry up hose end)
- Heat gun (to soften rubber hose)
- Radiator flush cleaner (additive to add in before
These tools along with others that I use and recommend are found on the recommended car stuff page. Go there to see the complete list of my favorite tools. All of them I have tried and tested.
Related Questions
Do I have to remove the radiator to backflush the cooling system?
You do not have to remove the radiator to backflush it. It is feasible to effectively clean the cooling system with the radiator in place.
Do I have to remove the thermostat to backflush the cooling system?
You do have to remove the thermostat to backflush the radiator because a backflush is pushing water the opposite direction the coolant usually travels. The thermostat would otherwise prevent the water from passing through the engine.